| Working with the Morph Composer |
The Morph Composer is a video editor using which you can compose a single movie out of many separate elements. A composition created using the MorphComposer can include any of the following elements.
The steps to follow to create a new composition are
Let us take that the movie you want to create must have 50 frames totally, and is 320 x 240 pixels in size (you specify these in the Compose>Options dialog). You can use any number of elements to create this movie using the Composer. First, gather the elements (images, AVI files and Morph projects required), then create a new Composer project and add all the elements into the new composer project.
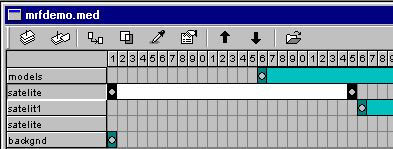
A sample screenshot of a Composer Window
For each morph added, a horizontal ‘bar’ is displayed in the Composer, with the name of the morph project on the left of the ‘bar’. To select a morph sequence, just click on the corresponding ‘bar’. Each morph sequence in the Composer has the following properties:
To learn more about these properties, take a look at the topic Properties of an element in the Composer.
| Related Topics |
Morphing with WinMorph
Properties of an element in the Composer